 Out4Mind Your multi-thematic blog
In this article I’m going to describe the necessary steps to install Cordova and setup Netbeans to use it as our IDE for coding mobile apps. Although we can even use any simple text editor to write our code and use the console to enter Cordova’s commands, I decided to post this article for those who are used to use Netbeans and like it as I do. I use Arch Linux, but the process should be similar for any other Linux distro. However, in some cases you may need to install NodeJS first and install Cordova with the “npm” package manager.
Just in case you don’t have Netbeans installed yet, install it using your distro’s package manager as root or using sudo:
$ sudo pacman -S netbeans
Usually, if you don’t have installed any Java environment, you’ll be asked to select a JDK version to install. I would recommend JDK8.
Cordova needs NodeJS and, as I already mentioned, it can be installed using the “npm” tool. Both NodeJS and NPM packages can be installed from the Arch Linux official repository. However, Arch already provides Cordova as a package in their repos, so you don’t need to use “npm” for this task.
We can then install Cordova from the official repos:
$ sudo pacman -S cordova
Nevertheless, if you didn’t have installed NodeJS and NPM yet, you will see them appear to be installed as needed dependencies together with other packages:
resolving dependencies...
looking for conflicting packages...

Packages (8) acorn-4.0.4-1 browserify-13.3.0-1 http-parser-2.7.1-1 libuv-1.10.2-1 nodejs-7.4.0-1 npm-4.1.1-1 semver-5.3.0-1 cordova-6.4.0-2

Total Download Size:   21,00 MiB
Total Installed Size:  69,02 MiB

:: Proceed with installation? [Y/n]
In case you want to develop apps for Android, don’t forget to install the Android SDK as it will be needed by Cordova to compile your APKs. Visit https://developer.android.com/studio/index.html to install the tools and Android SDK. You can also install the package “android-tools” from the Arch Linux official repo or use AUR (Arch User Repository) packages. For more information please visit https://wiki.archlinux.org/index.php/android.
And to end with, we still need another tool: GIT. Please install it from the official repo in case you didn’t have installed it already:
$ sudo pacman -S git
Finally we are ready to start Netbeans! It might be possible that Netbeans will ask you to update some plugins and, in case you kept Netbeans opened while installing Cordova, you’ll need to restart it. Also, make sure you have the HTML5 plugin installed and activated. If not, install and activate it:

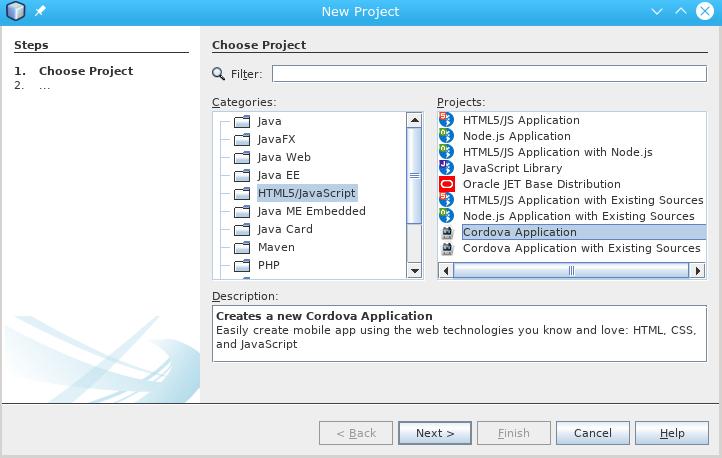
Let’s then create a new project, select the category HTML5/JavaScript and the project type “Cordova Application”:
Let’s be different and instead of naming the project as “HelloWorld”, let’s name it “HelloCordova”!

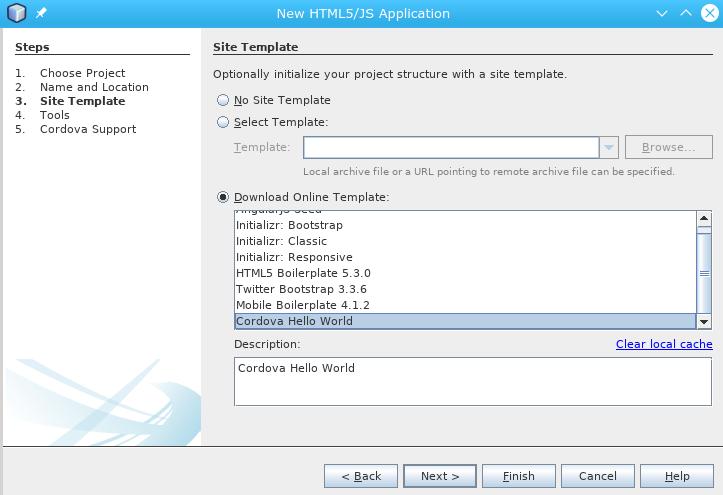
Next we can choose a template for our project or just start it from scratch. In this example, let’s use the template “Cordova Hello World” (damn, it has always to appear a “Hello World” after all):
We can also select some useful tools:

And, finally, some options for our app such as the ID (package), name and version:

Having the wizard finished, we have our project created and we can find the files that were created for us:

We can find a new icon in the toolbar. With it we can select how we want to launch our app:

 The green arrow (Run) allows us to launch the application. Now, remember that Cordova will need to know the path for the Android SDK in order to build an Android app, or even use its emulator. However, if you click on “Run” for the first time, and you didn’t have configured this data yet, a popup window will appear asking you to configure the Android Platform. Just click OK.

In order to setup the “ANDROID_HOME” environment variable, you can use the script “~/.bashrc” in your “home” directory and add the following (please adapt according to your SDK location):
export ANDROID_HOME=${HOME}/Android/Sdk
export PATH=${PATH}:${ANDROID_HOME}/tools:${ANDROID_HOME}/platform-tools
This is important. If you forget this step you’ll probably find errors when building your project for Android. In my case I also added the binary tools from the Android SDK to the PATH variable.
Also, don’t forget that you might need to install Android components such as system images and build tools, create a virtual device at least or use your phone or another emulator to watch your app running.
You also should remove all unnecessary plugins. By default, Netbeans adds some plugins but we can remove them by going to the project properties, category “Cordova” and click on the Plugins tab.

Having everything configured, let’s now click on Run and watch our app running!

Later, we can add any plugin we’d like according to our needs. However, let me tell you that sometimes Netbeans fails to build a project with some plugins. In this cases, the only solution you have is to manually build your app using cordova in the command line but keep using Netbeans to edit your code…


